
My daughter was dismayed that our Xbox One console that we’ve had for 7 years would not power on. It would just make the do-do-dut sound when the on button was touched.
It was a rainy weekend, so I thought let’s have a go at this. It ended well and only cost $5 in parts.
Testing the power supply
The first step was to check out the power supply or power brick as it is sometimes called. The Xbox One has a funky dual barrel connector. The connections are
| Connector Part | Function |
|---|---|
| Outside of barrel (both) | Ground or -ve |
| Inside of barrel (both) | +12 Volts |
| Left inner pin (when viewing the plug from the power supply) | +5 Volts standby |
| Right inner pin | Input pin to PSU. Apply +5 V to turn on. Apply 0 V to turn off |
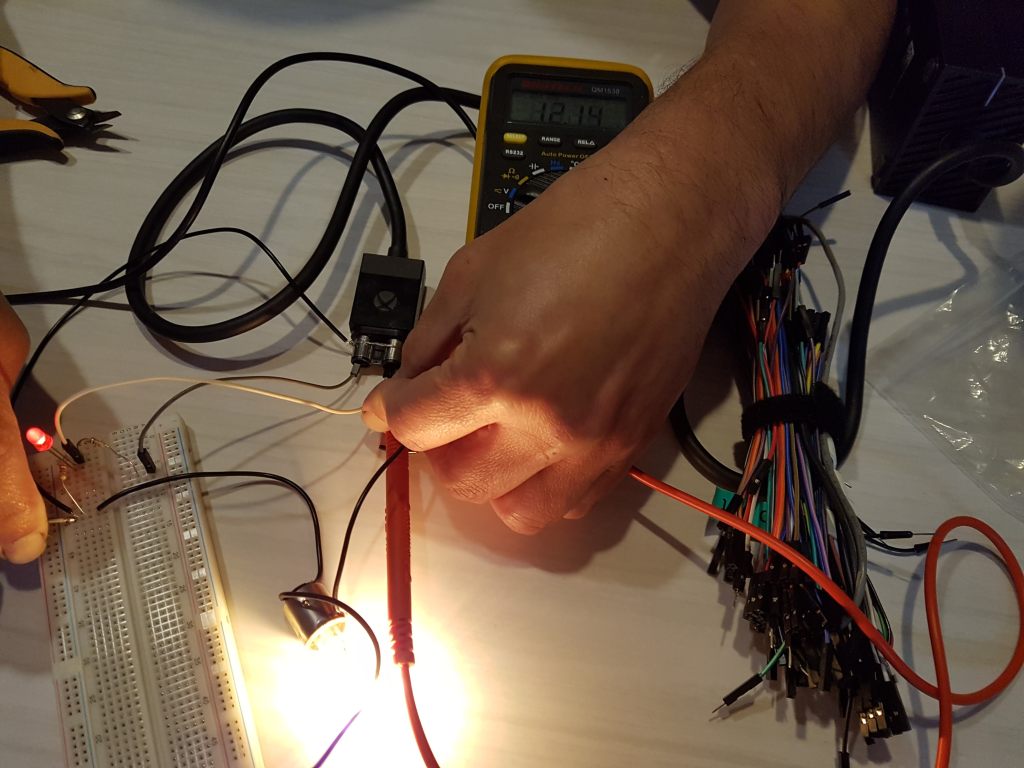
I jigged up an LED and a 12V bulb from a car brake light. The LED, with a 220 ohms resistor in series, is connected between the power supply ground and the +5 volt standby. The bulb is connected between the power supply ground and +12V. I plugged the power supply into the mains, the red LED lit up. I then connected the +5 V standby to the right inner pin of the power supply connector and the bulb glowed brightly as you can see in this photo.
Testing the Console
The power supply is working, let me have a look at the console itself. After searching for how to pry open the case and remove a dozen or so screws, I could see the innards of my Xbox One. It was a bit dusty after 7 years of use, we also have cats which didn’t help. The vents were clogged and so was the CPU heat sink. I unclipped the CPU fan, vacuumed it well. Wiped the circuit board with some isopropyl alcohol. The Xbox was looking good as you can tell from the photo below.

There was nothing obviously wrong there, so the next step was to try hooking up a PC power supply that I had in one of the many boxes in my garage 🙂
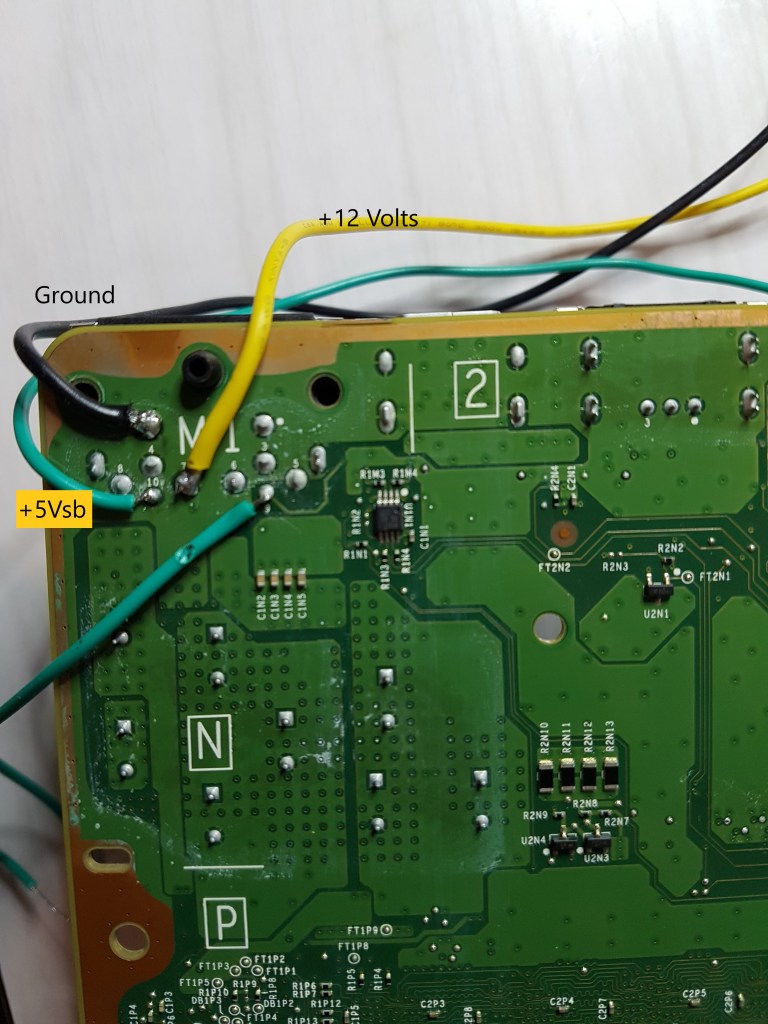
We needed to hook up the +12V, +5Vstandby and ground from the power supply to the Xbox One motherboard as shown below. This is the underside of the motherboard in the cell M1. The PC power supply will need to be turned on by connecting pin 16, the green wire, to ground, black wire in pin 15, on the ATX connector of the power supply.
The Xbox was alive, CPU fan started spinning

I then had to go find a monitor and an HDMI cable, the Xbox was working!

That meant that the problem had to be the Xbox power supply even though it could light a bulb.
Opening the power brick requires a tamperproof torx T-10 driver. It has a hole in the centre of the bit as you can see from the photo below
WARNING: High voltages may be present even after the power supply has been disconnected from the mains.


Looking inside the power supply, I felt good seeing something bad, coz that meant it should be an easy fix. There were a few bulging electrolytic capacitors. You can tell from the domed tops in the picture below.
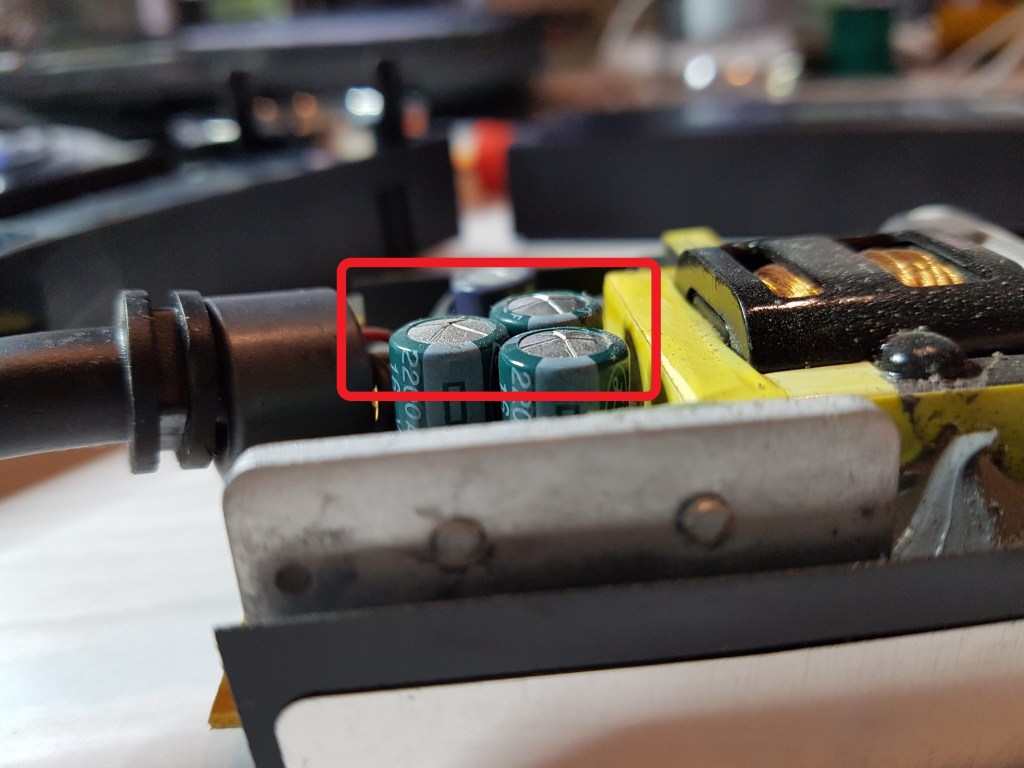
Time for my daughter to fix it ! Take out the old caps and put in some fresh ones. Three of them were 2200uF and one was a 1500uF

End result was one fully working Xbox One and one happy daughter 🙂
Parts Used
I only needed 4 capacitors for a cost of less than $5. I used some low ESR capacitors as are common in switch-mode power supplies. Three 2200uFarads 16 Volt electrolytics and one 1500uF also 16V. It’s a tight fit inside the power brick, make sure you get capacitors that have a diameter of 10mm or less. The photo below gives you an idea of the dimensions.

