My daughter’s boyfriend came around at 4pm on a Saturday to change the head gasket on his old Toyota Celica. Haha, very funny, I thought. I would have started a job like that early in the morning in the hope of completing it in a day. Anyway, 4 weeks later the car is back together and running again. This was a 2.2L 5SFE engine which is also found in Camrys of that era.
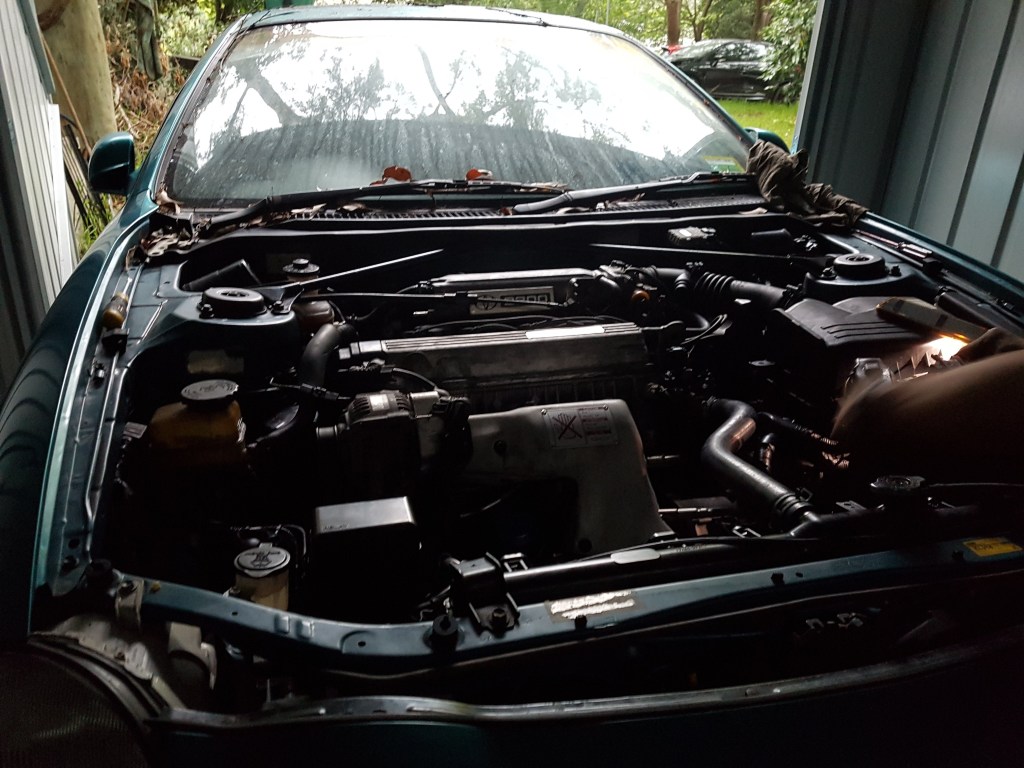
Engine back in the engine bay and it runs!
His idea was simple enough, take the cylinder head off after removing the manifolds and camshaft cover.
However, to fit this large 2.2L engine in the low sloping Celica bonnet, Toyota had slanted the engine. This meant it was impossible to remove the intake manifold. This was even more difficult with bolts that had been on for 25 years!
Time for plan B ! Take the whole engine out, it will be easier to work on the cylinder head ! Knowing we would have to deal with seized nuts, stripped bolts and brittle hoses 😦
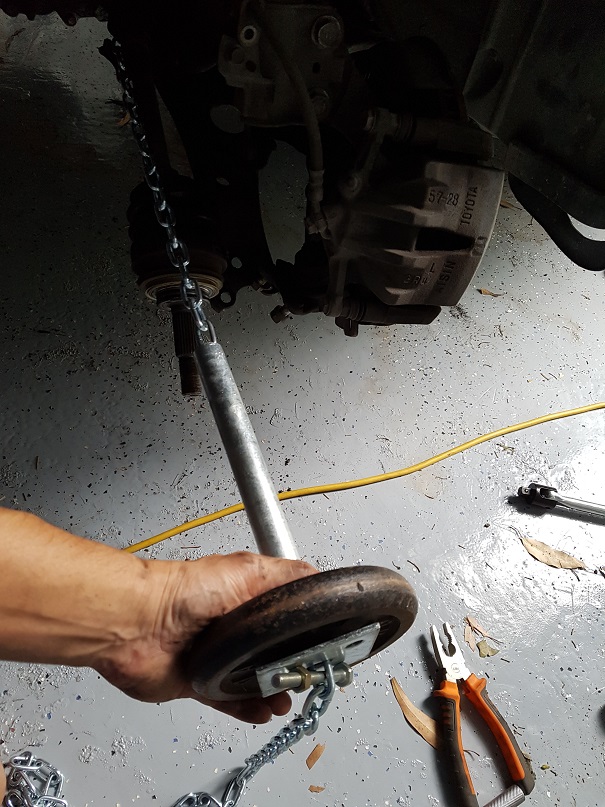
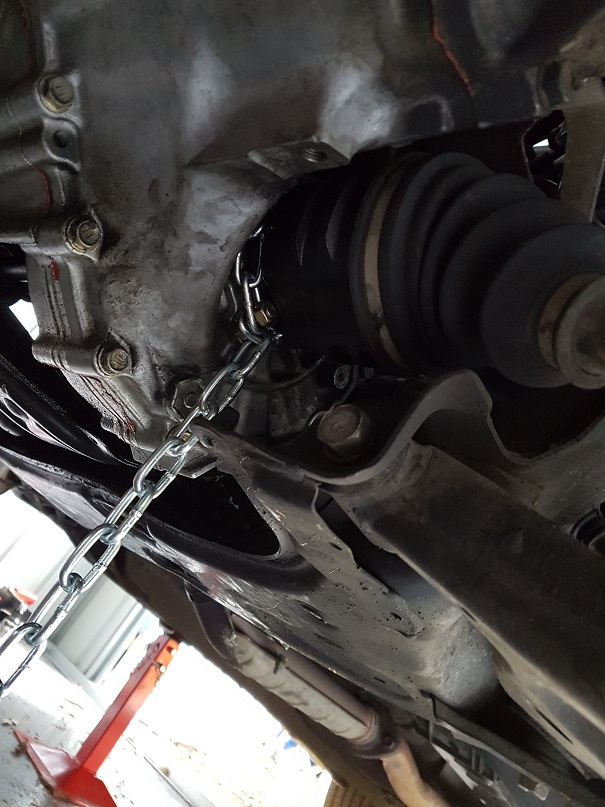
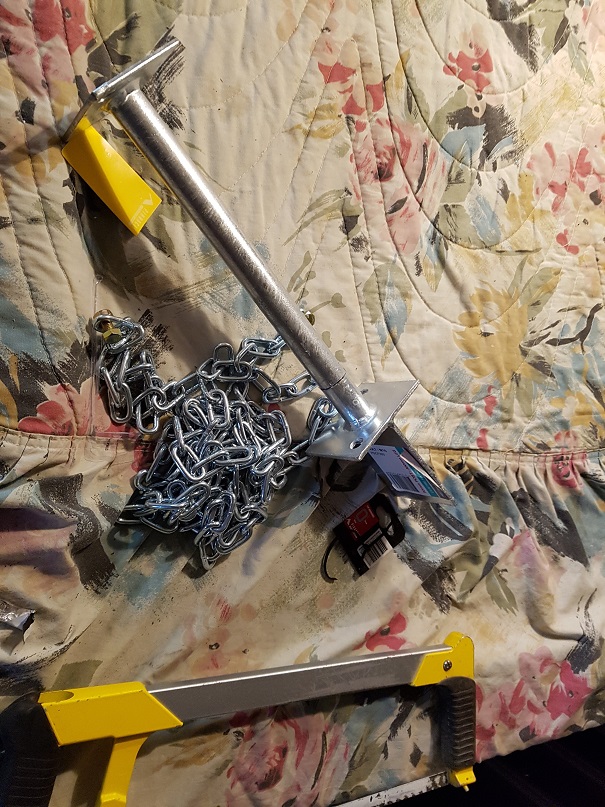
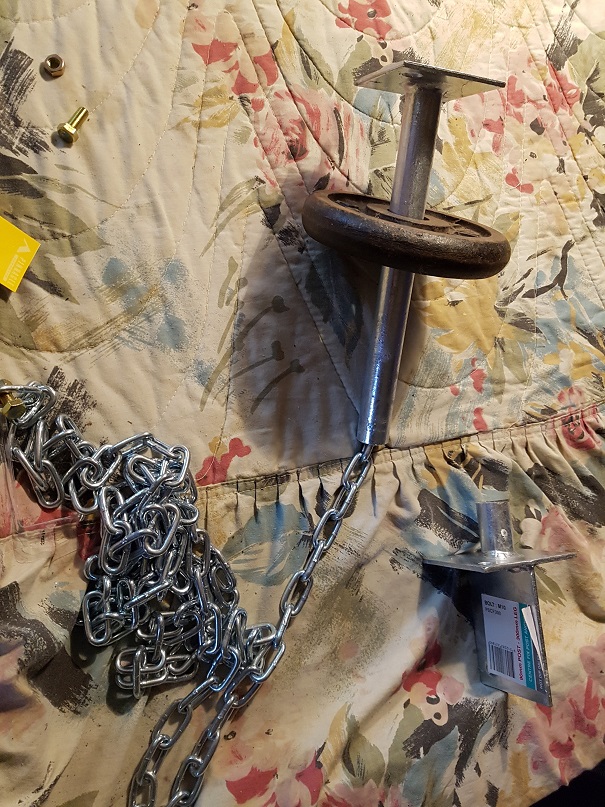
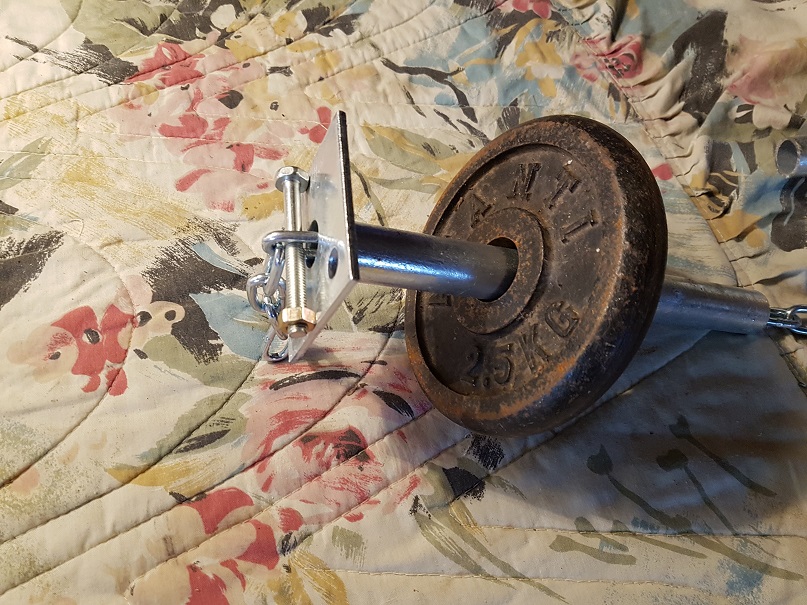
Problem #1 Pulling out the driveshafts. The local tool store didn’t have a specialised slide hammer in stock. So I went to Bunnings, grabbed a post support, a piece of chain and some bolts. Hacksaw away and add a 2.5Kg weight and voila! Wrap the chain around the driveshaft, lock with the bolt and slam the weight to dislodge the shaft.
Next step was to disconnect the exhaust, my helper managed to round one of the nuts by using the wrong size socket. To be fair this one was an imperial size rather than the usual metric nuts in the rest of the car. I had to resort to using a bolt extractor socket from Supercheap Auto.
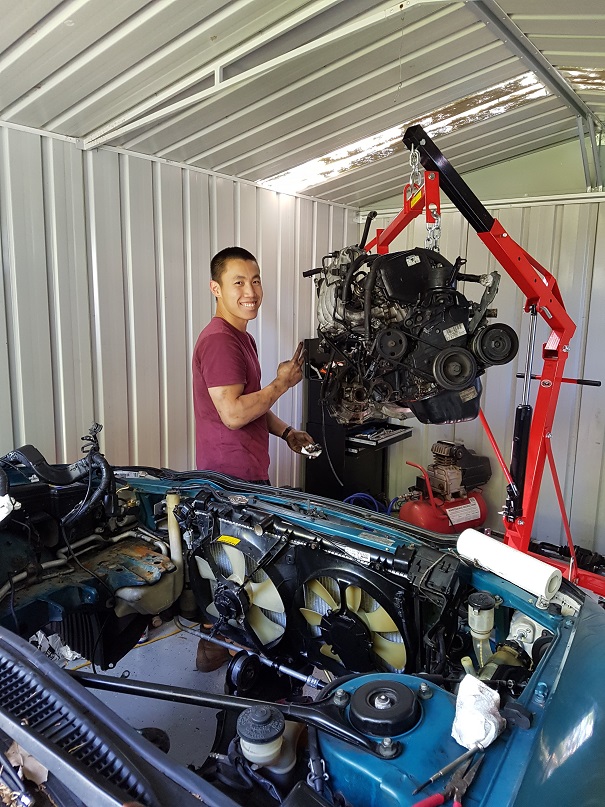
A few stubborn nuts and a lot of oily grime later, the engine was free. It took a great deal of maneuvering to lift the engine out. It is just a bit too long that it needs to be tilted so that the transaxle does not hit the support mount.
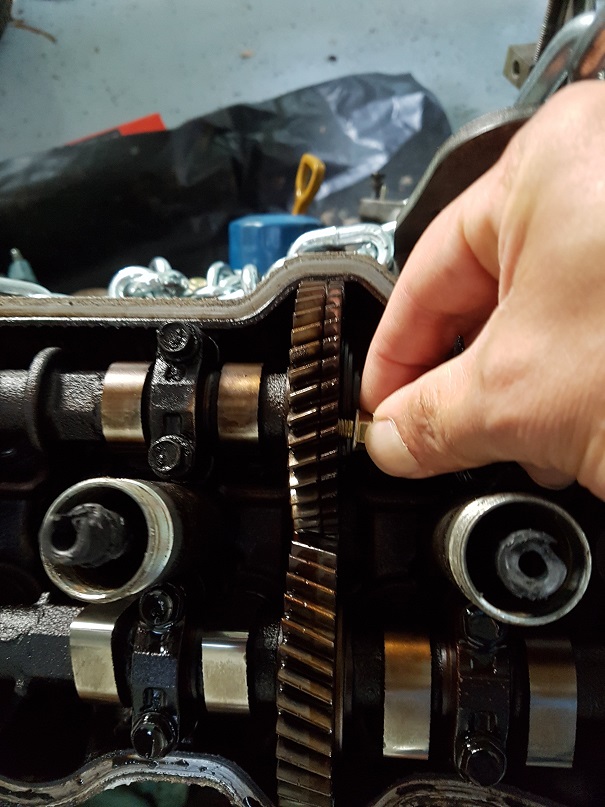
Before removing the camshafts, insert a bolt into the scissor gear to stop it from snapping off.

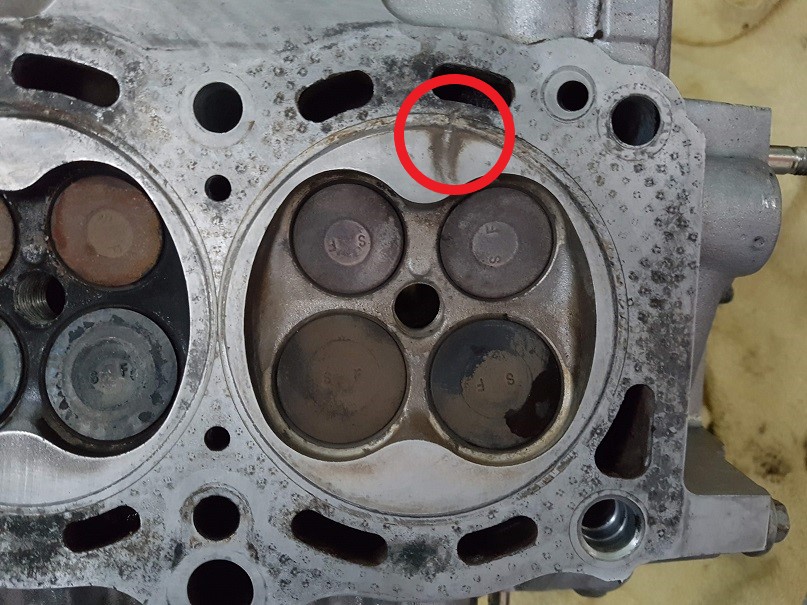
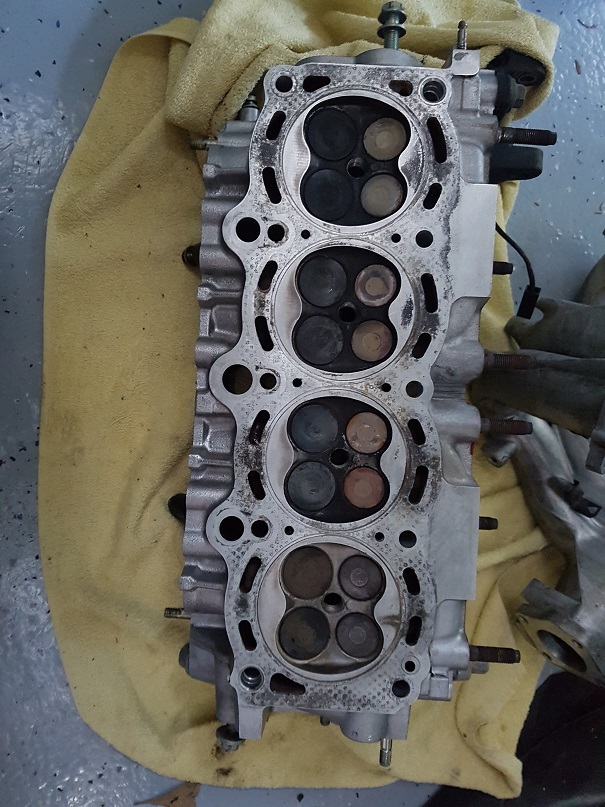
Finally, got the cylinder head off. After some cleaning, it was obvious that cylinder no 1 had a problem. Firstly the valves and cylinder top were very clean. There was no carbon deposit like the other cylinders. The coolant must have been keeping it clean! Secondly, the blown off area in the red circle shows a gouge where compression would have been lost and coolant sucked into the cylinder.
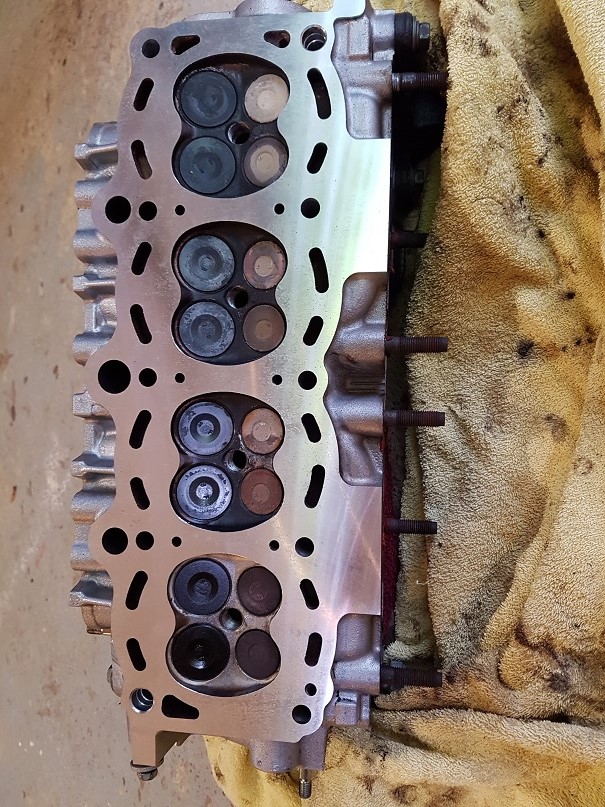
Took the cylinder head to Nas at Thornleigh Cylinder Heads to get machined. A few days and $100 later, the cylinder head had a mirror finish and no more gouges. Use the slider below to compare the before and after photos.
A short time later my assistant put a new head gasket and the head back on not forgetting to use new bolts! Putting the camshafts back on was a bit more dramatic, he managed to snap one of the camshaft holder bolts 😦 Luckily there was enough of the broken bolt sticking out that we could unscrew it without too much drama. The harder part was getting a replacement bolt because it was an M7 x 40mm which isn’t commonly available. Remember to remove the bolt that we put in the camshaft scissor gear.
Then came the battle to wriggle the engine back into the engine bay and bolt all four of the engine mounts.
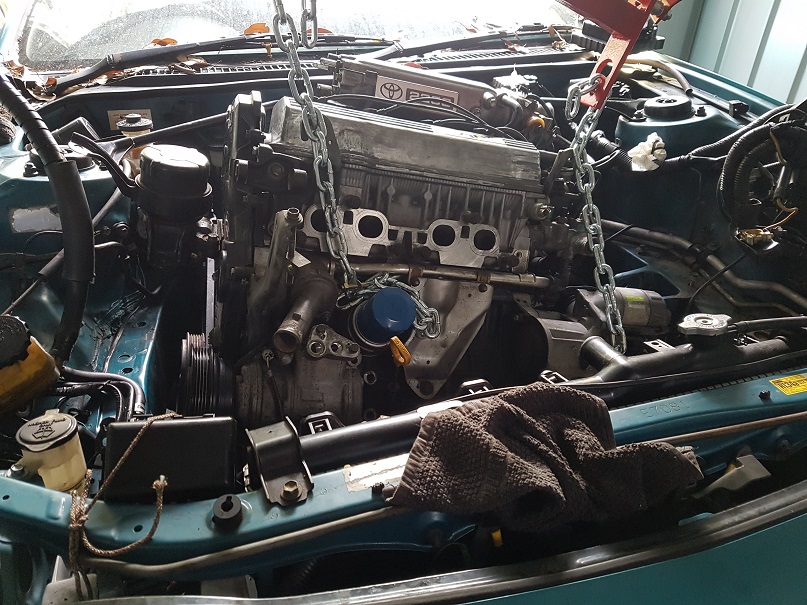
After four weeks, mostly due to buying parts as they broke or being hard to find, the engine was back in the engine bay. It would have been too good if it had started straight away! The starter motor was turning over. Time to check for spark using a screw driver in the spark plug lead with the screw driver a few millimetres from the engine. Nothing !
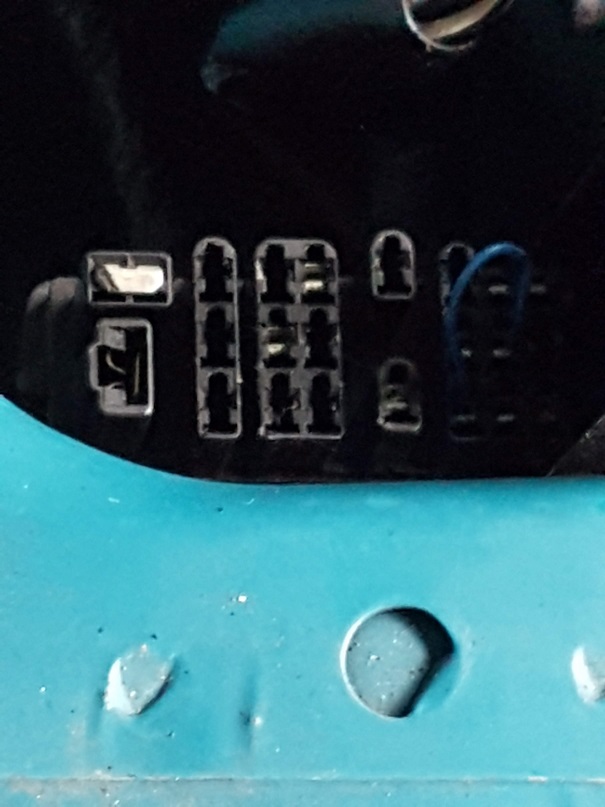
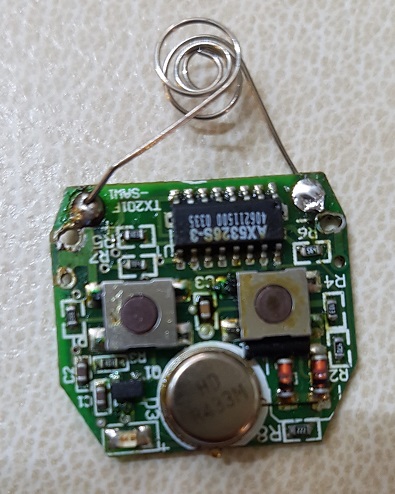 First check the aftermarket alarm that could be preventing the engine from starting. The battery connector in the remote was broken, a bit of soldering and that was working again. Unfortunately, there was still something wrong. The engine malfunction light was on. Time to find out what the error code was. This car was pre-OBD2, so no fancy diagnostic tool needed. Simply put a jumper wire between TE1 and E1 in the diagnostic port in the engine bay. Make sure the ignition is off before doing that. After connecting the jumper wire, turn the ignition on without starting the engine. The Check Engine Light will display a two digit code by flashing with a 2 second pause between digits.
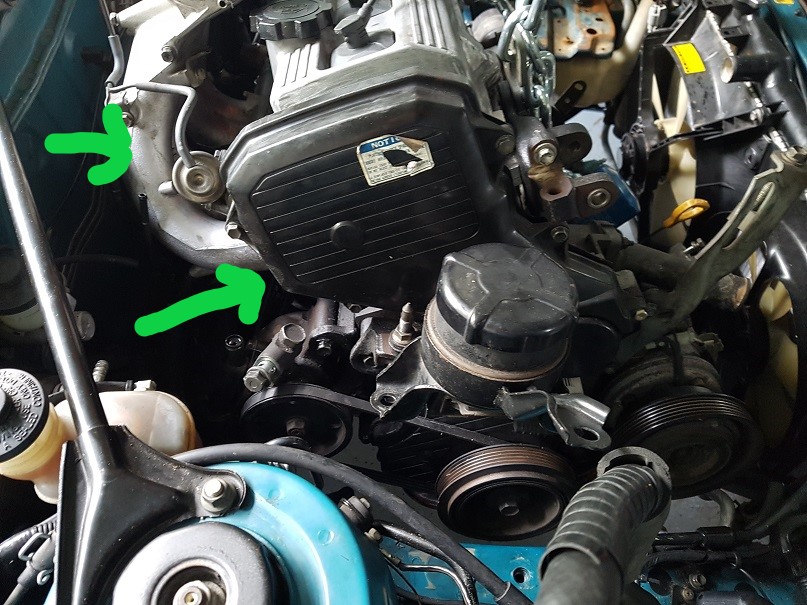
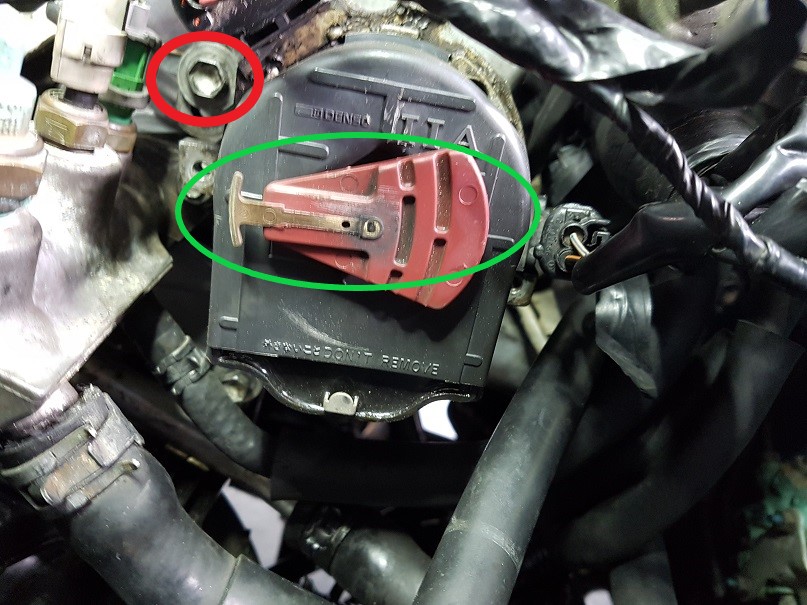
The one flash, pause, followed by two flashes told me that the error code was 12. Looking up troublecodes.net told me that this was a problem with the Engine Speed (RPM) sensor. It took me a while to find the sensor. I was looking for a crankshaft position sensor, but this variant of the 5S-FE engine did not have one. After some googling, I learnt that these sensors are part of the distributor. Sure enough, having a closer look at the distributor, I could see that the sensor connector has a few broken wires!
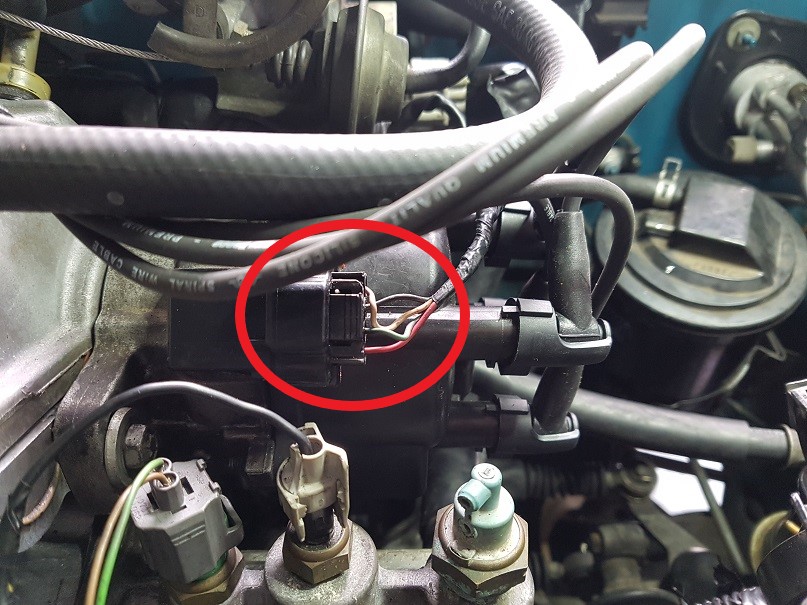
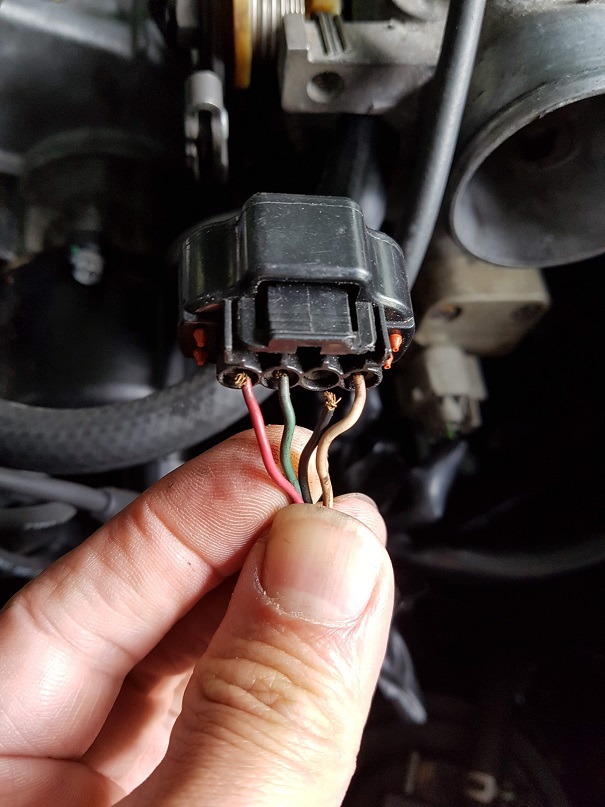
I carefully, dismantled the connector, stripped and soldered the broken wires then put the connector back together. Making sure I did not bend the other wires too much for fear of breaking them!
I then took out the “EFI” fuse for 30 seconds to clear the error code from the computer. I then checked the error code again by doing the ignition off and ignition on procedure with TE1 connected to E1 as above. Things were looking good, there were no flashing engine light !
Time to try starting the engine! Well, not quite there yet, but things were sounding better. I still had the air filter off, and could hear some mistimed firing through the inlet manifold. I pulled off the cover of the distributor to give the rotor a clean and then adjusted the rotation of the distributor.
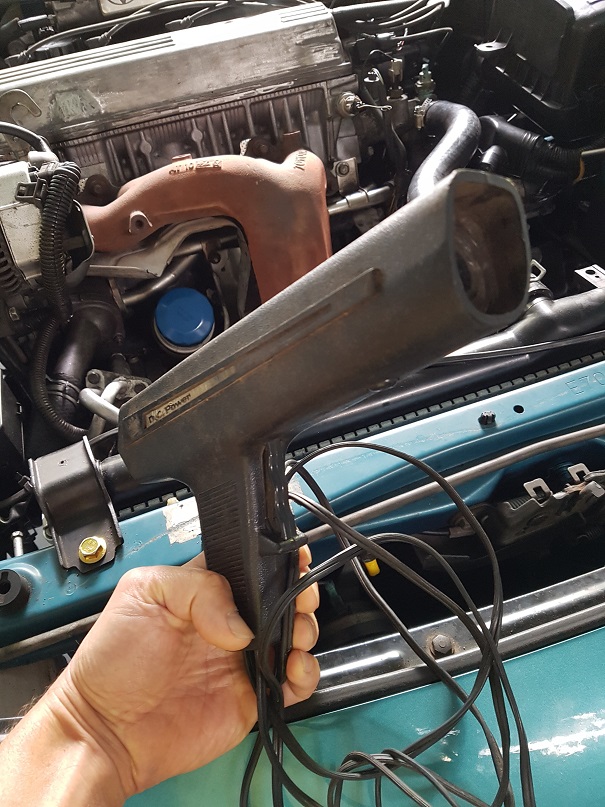
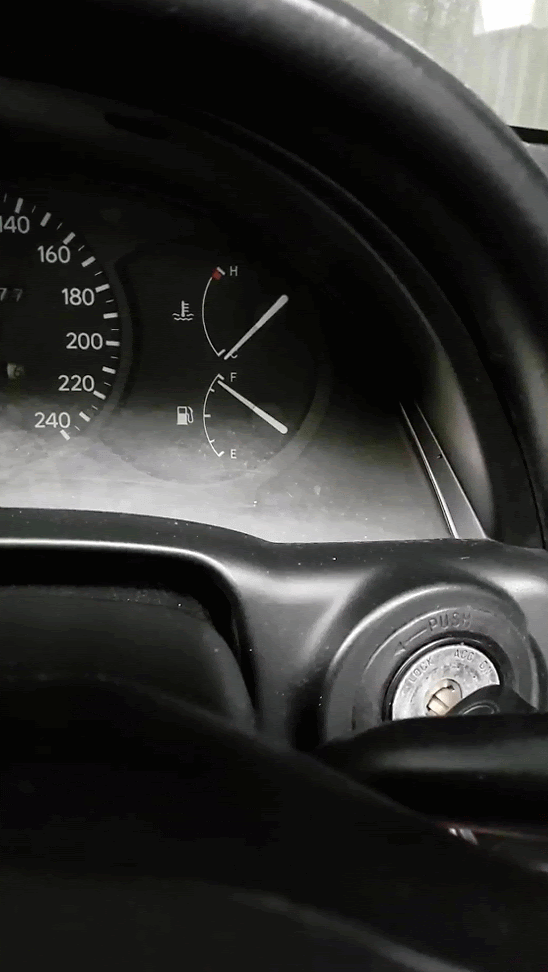
I then pulled out my 30 year old timing gun that I hadn’t used for ages. Adjusted the distributor until cylinder 1 was firing at 5 degrees before top dead centre. The engine was finally running! Yippee!